Logo
Engineering

Building Progressive Web Apps in 5 Simple Steps

Progressive Web App technology tutorial. Benefits, detailed procedure for building, adding manifest, service worker, deploying to Firebase and much more.

WT
Waverley Team
Content Writer
April 29, 202415 min read
Share
Building Progressive Web Apps in 5 Simple Steps
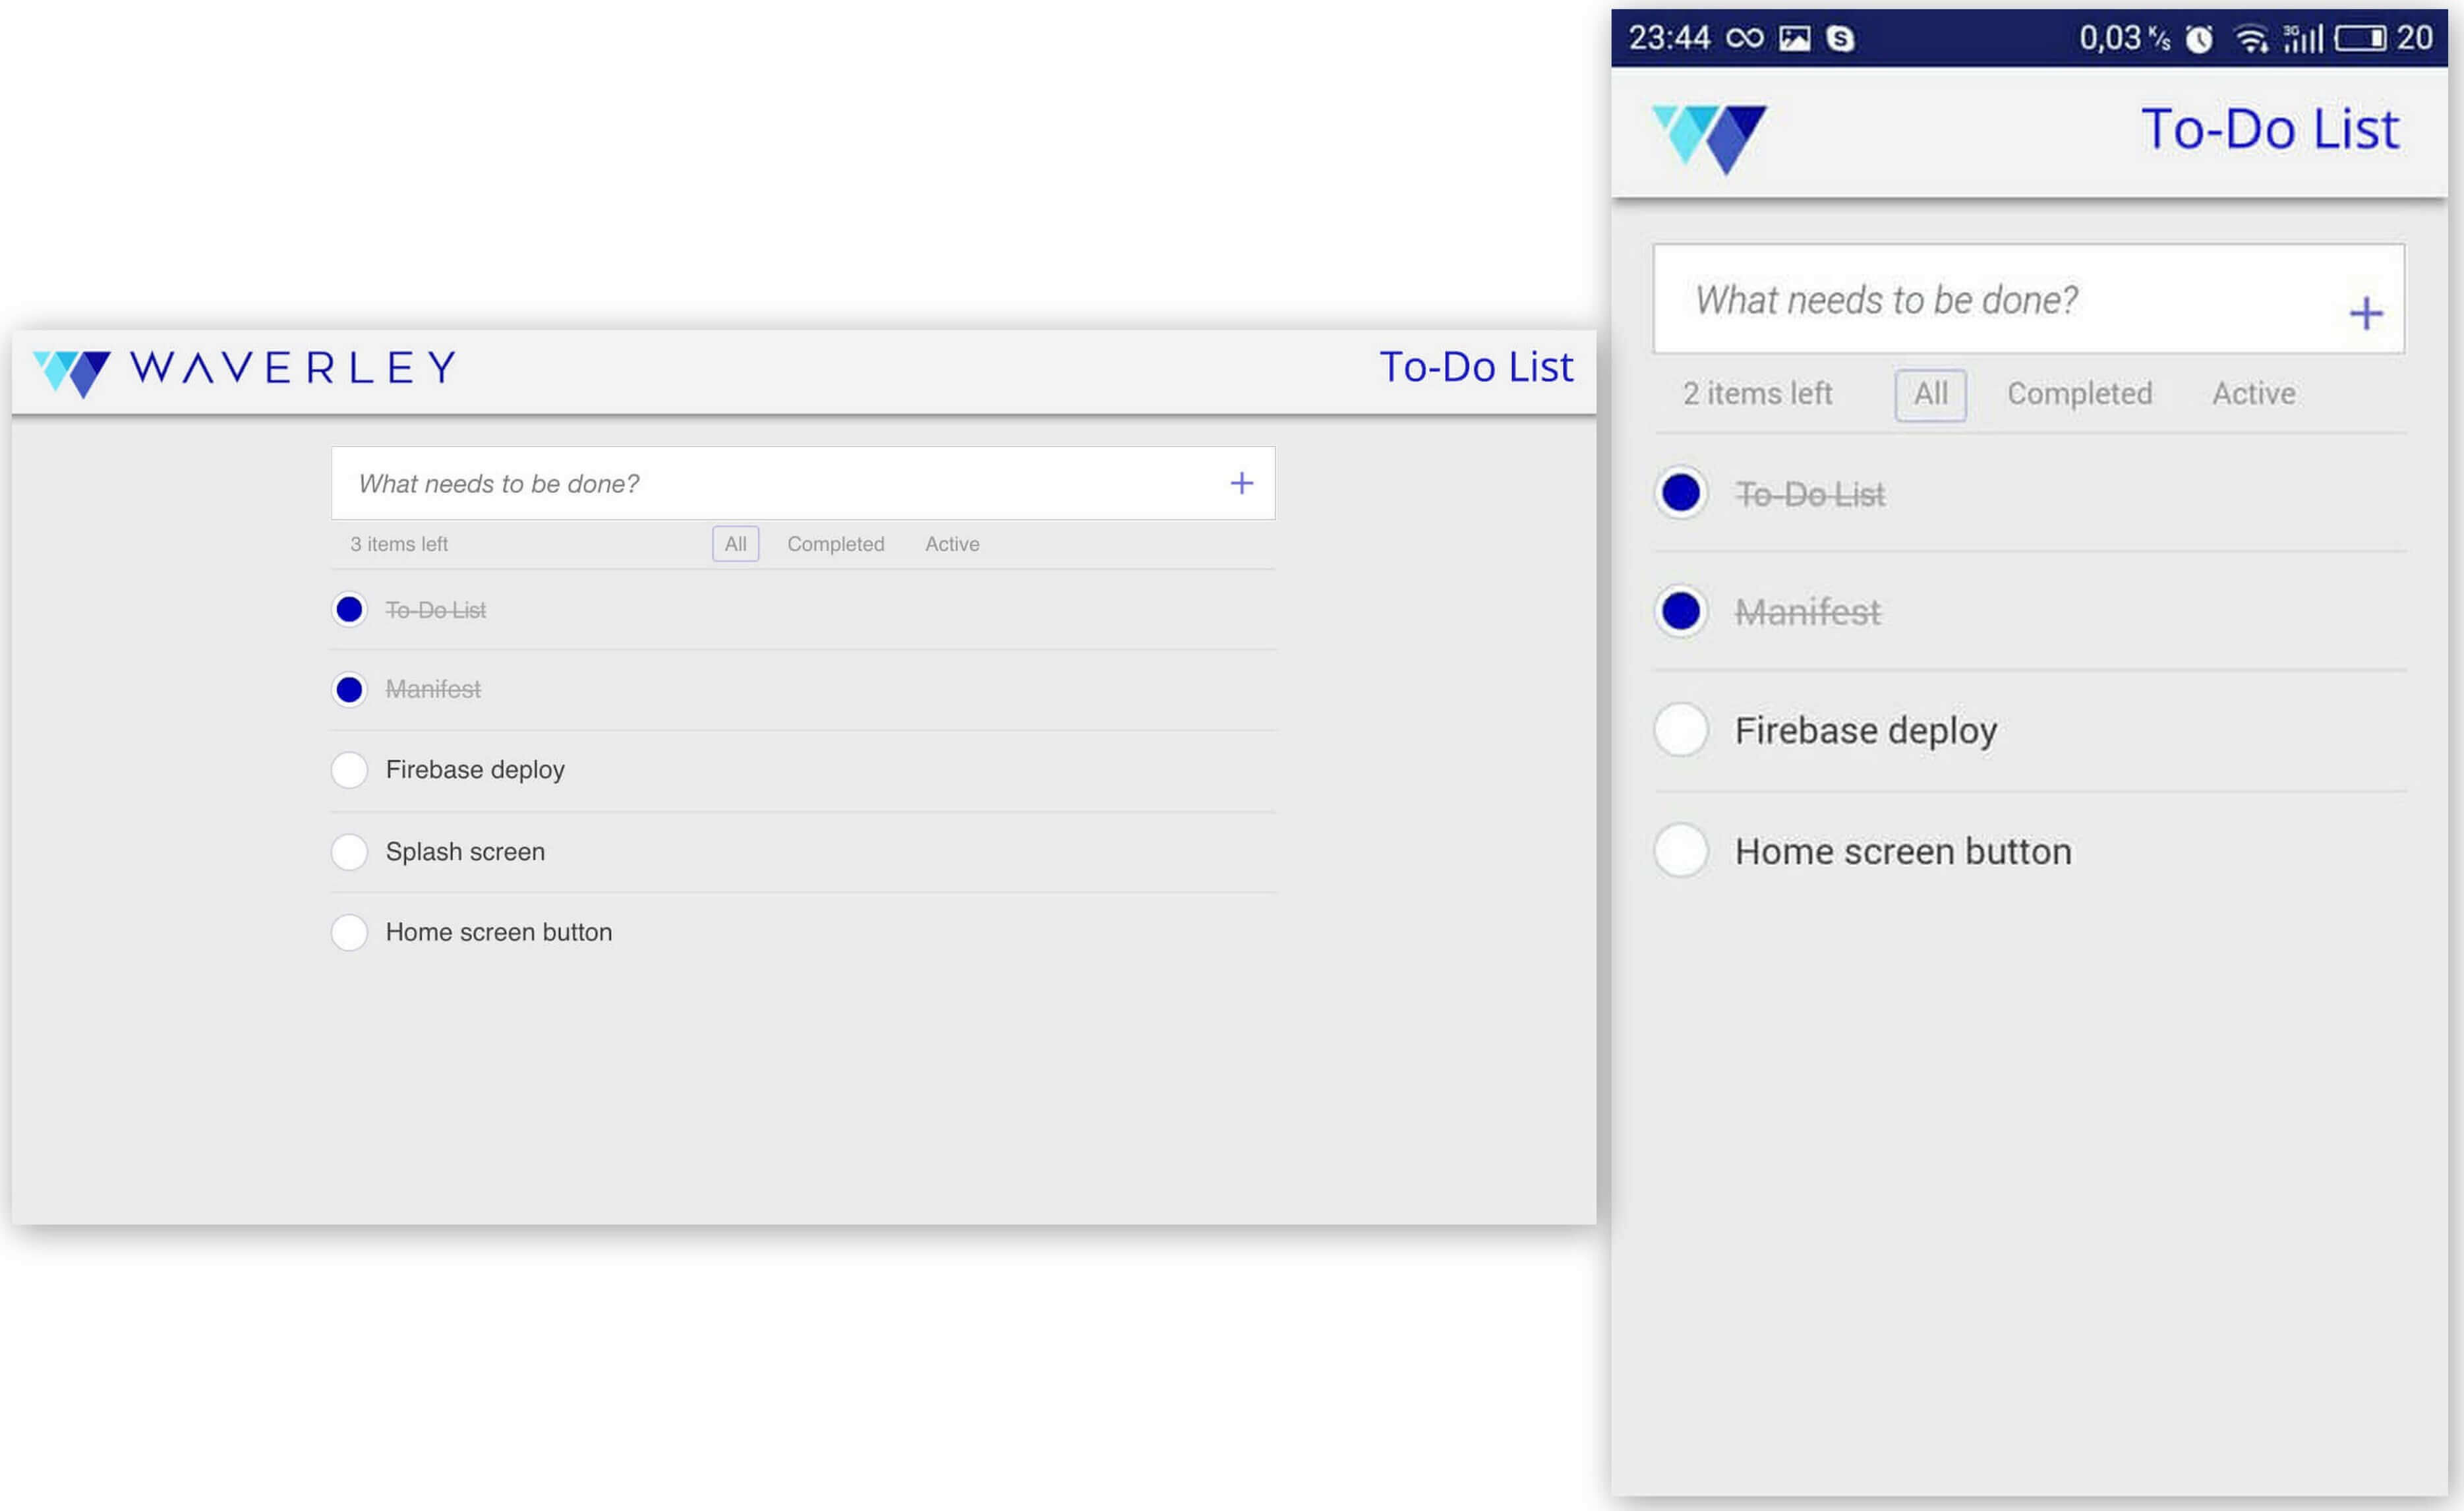
The To-do List App used as a working PWA example

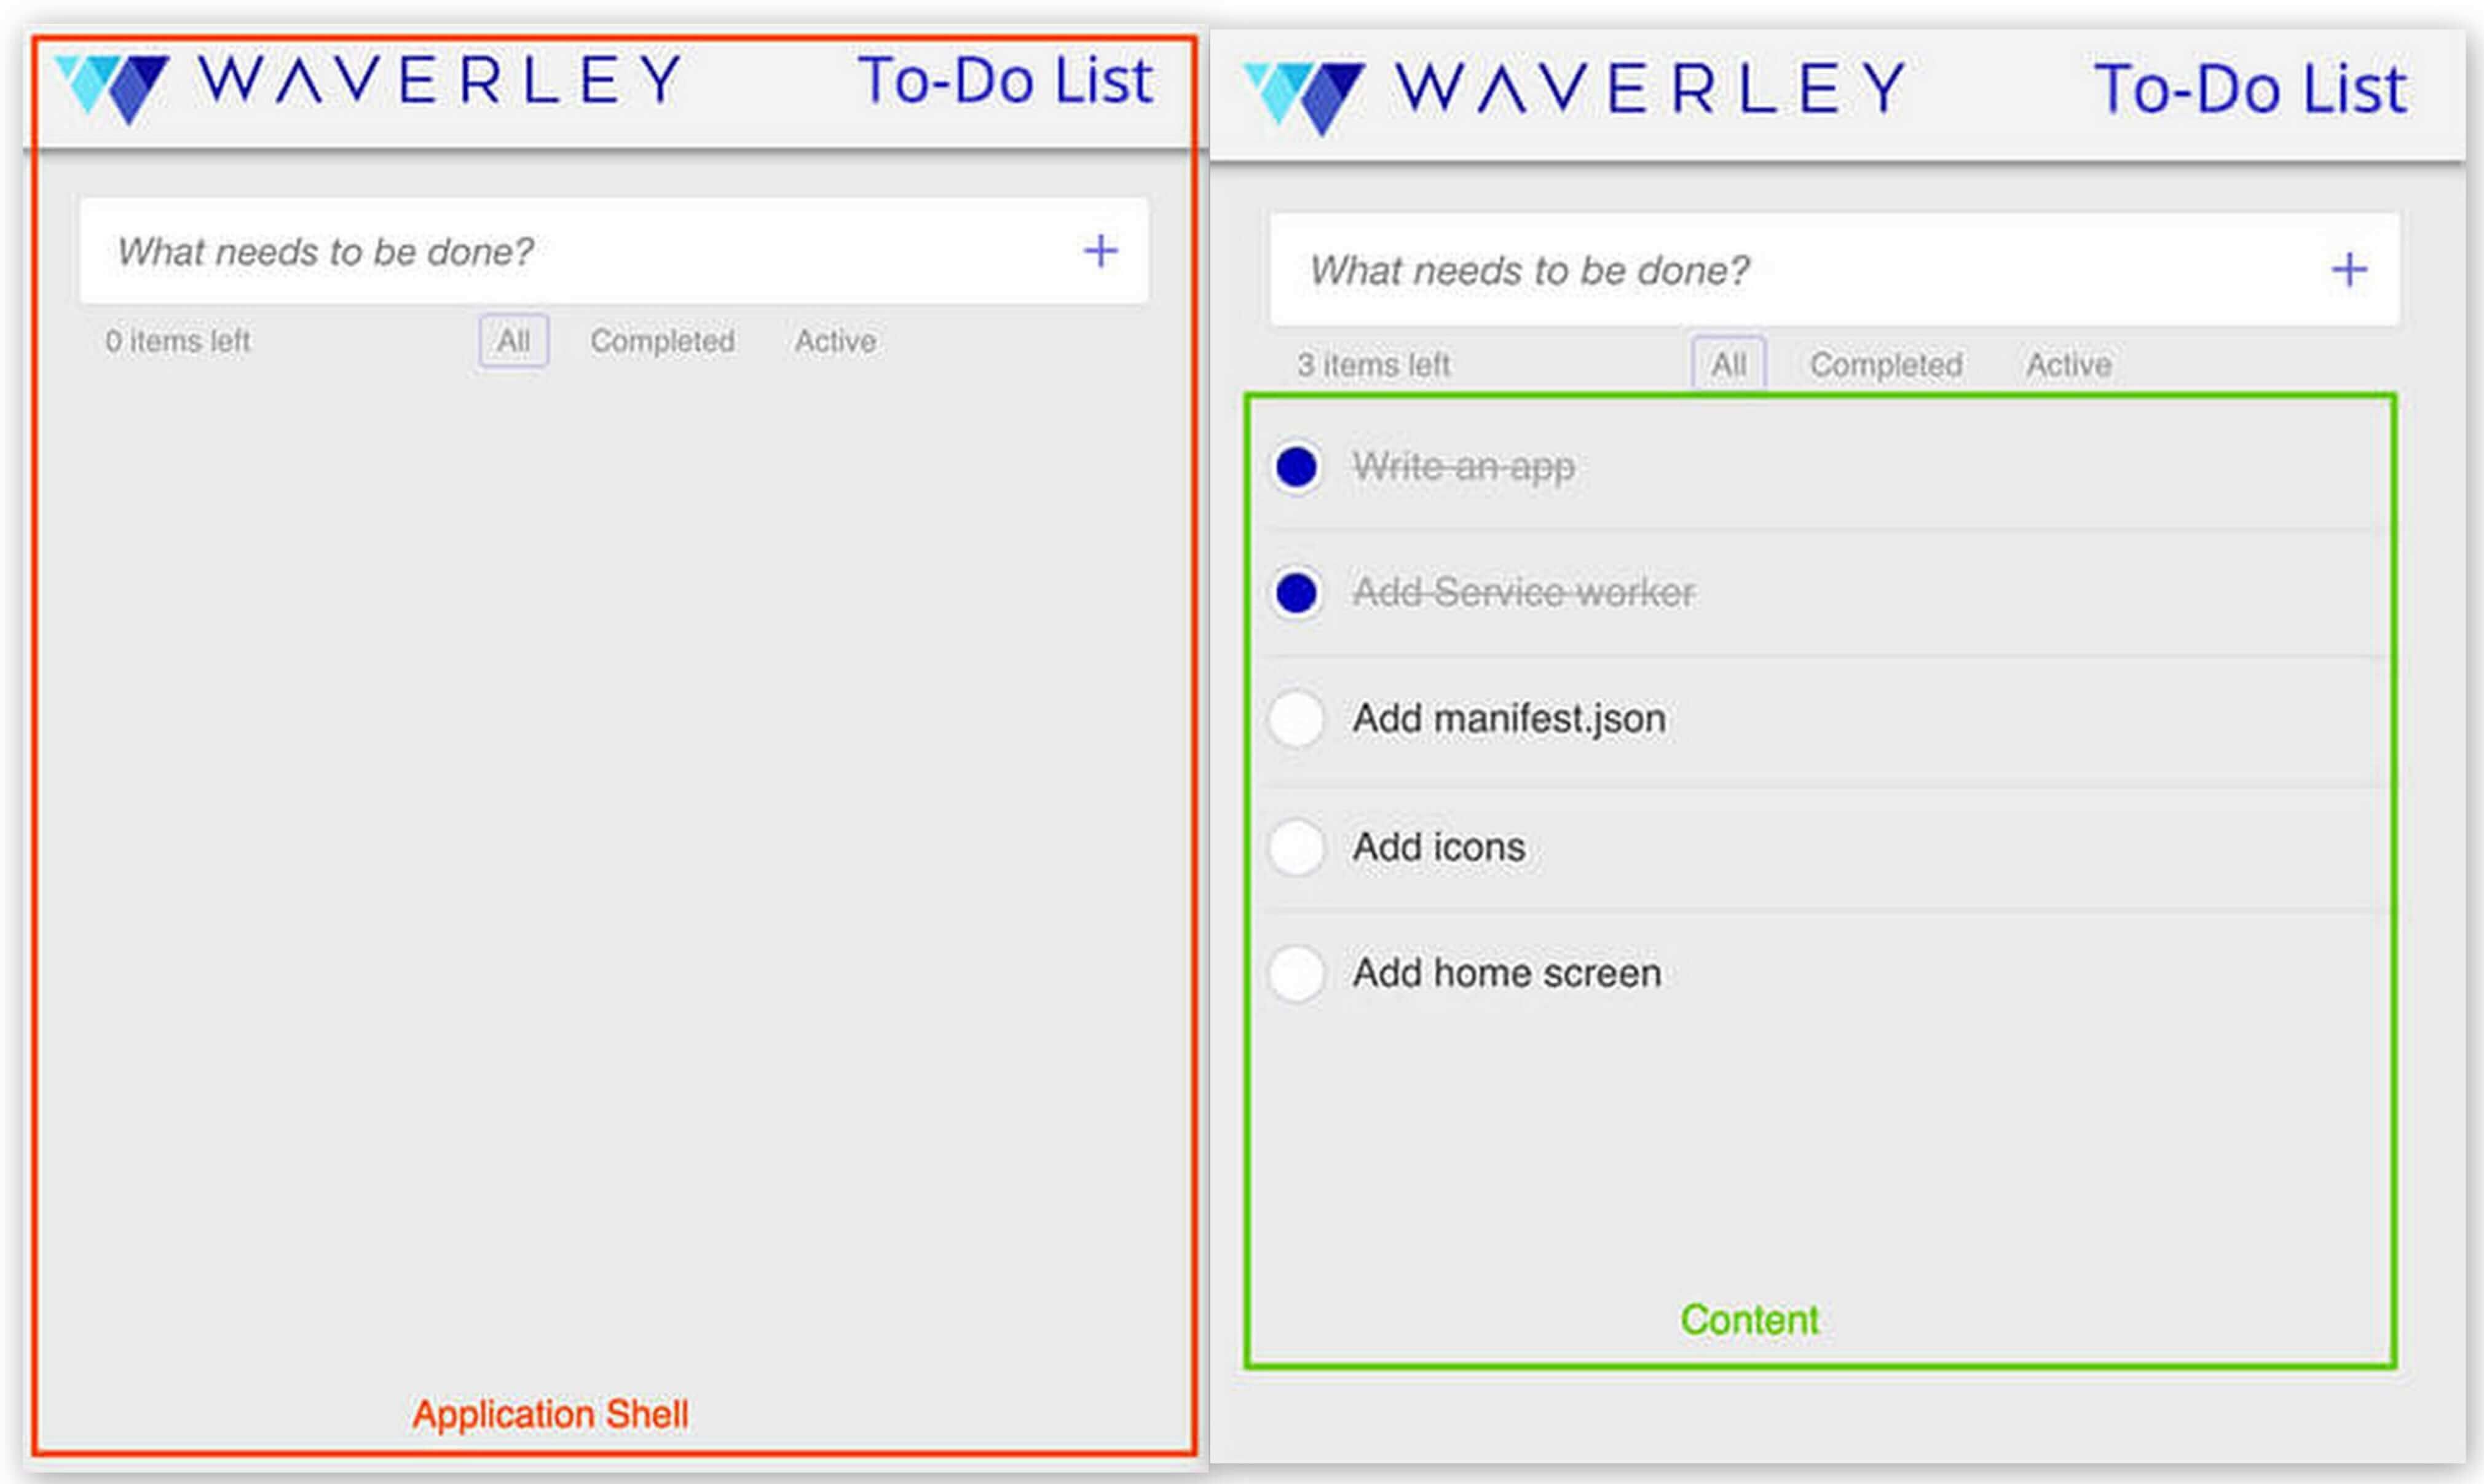
This is what provides the ability to cache the Application Shell as well as work offline. Thanks to this, your app can work without any internet connection. Even if the application itself has recently been closed. Moreover, if the user visits it repeatedly, Progressive Web App loads significantly faster as all resources are cached.

However, let’s move from theory to practice. To give you a basic understanding of Progressive Web Apps in practice, we will create a simple working sample.

(drum roll please) Ladies and Gentlemen, please welcome the To-do List App!
Step 1: Let us build a simple To-Do List App

We will not attempt to reinvent the wheel. We are going to use a well-known practice and an ordinary set of source code, displaying the Progressive Web App benefits along the way.

Imagine we are working on an MVP (Minimum Viable Product). However, there will be no frameworks, libs or packages. Our goal is to understand the Progressive Web App approach, not to produce perfect code.

Creating a To-do List App is considered to be one step above the usual “Hello World”, which is the “standard” example people use when teaching a new language or technology.

Our to-do list will provide a user experience with post-it notes, which can be used anytime, even when you do not have an internet connection. The App will be simple and easy to use via the desktop icon, looking native.

Step 2: Which Boilerplate to Use?

The Google developers provide us with a few different boilerplates for interesting apps. However, we will not use any boilerplate in order to better learn how to create our own. This building process will allow us to dive deeper into the PWA technology basics.

Basic Web App file structure

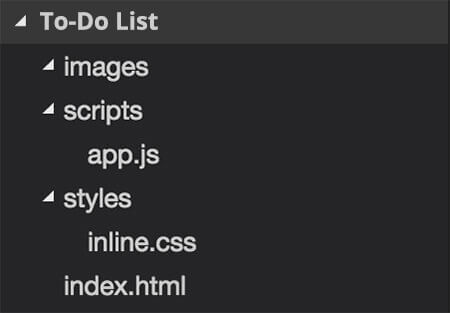
First, we will use the simplest and clearest Web App (Basic WEB-Technology stack: JS + HTML + CSS). There are a few files which are basic for the app creation. Like a regular website skeleton, there is nothing new.

  • app.js – To-do List app code
  • inline.css – file of styles
  • index.html – markup file, listed below:
<!DOCTYPE html>
<html>
<head>
     <meta charset="utf-8">
     <meta http-equiv="X-UA-Compatible" content="IE=edge">
     <meta name="viewport" content="width=device-width, initial-scale=1.0">
     <title>Todo list</title>
     <link rel="stylesheet" type="text/css" href="styles/inline.css">
</head>
<body>
     <header class="header">
          <h1 class="header__title">
               Todo list
          </h1>
     </header>
     <main class="main">
     </main>
     <script src="scripts/app.js" async></script>
</body>
</html>

For an MVP To-Do app the simplest “TO-DO in HTML5 and plain JavaScript” by Gabor Szabo will be enough as a skeleton. We will add a filtering idea and our beautiful corporate style to build a sample. All of the code is placed into the app.js file.

To-do List App skeleton built from app.js

Step 3: Let’s Make the App Progressive

There are two main things which are the “magic pillars” of the whole Application Shell.

  • manifest.json – a simple W3C standard JSON file
  • service-worker.js – a transparent Javascript events logic file, which provides offline experiences

Step 3.1: How to Add a Web App Manifest

The W3C Web App manifest can make your app indexable by search engines. Furthermore, indexable not as a usual website, but as a web app. It provides the ability to:

  • present your app by means of a few icons
  • make it discoverable
  • customize its layout and appearance
  • add a homescreen (splashscreen)
  • make it easily installable, without any app stores

How does a simple manifest.json look?

{
      "name": "Todo List",
      "short_name": "Todo",
      "icons": [
           {
                "src": "images/icons/android-chrome-192x192.png",
                "sizes": "192x192",
                "type": "image/png"
           },
           {
                "src": "images/icons/android-chrome-512x512.png",
                "sizes": "512x512",
                "type": "image/png"
           }
      ],
      "start_url": "/index.html",
      "display": "standalone",
      "background_color": "#3E4EB8",
       "theme_color": "#2F3BA2",
}

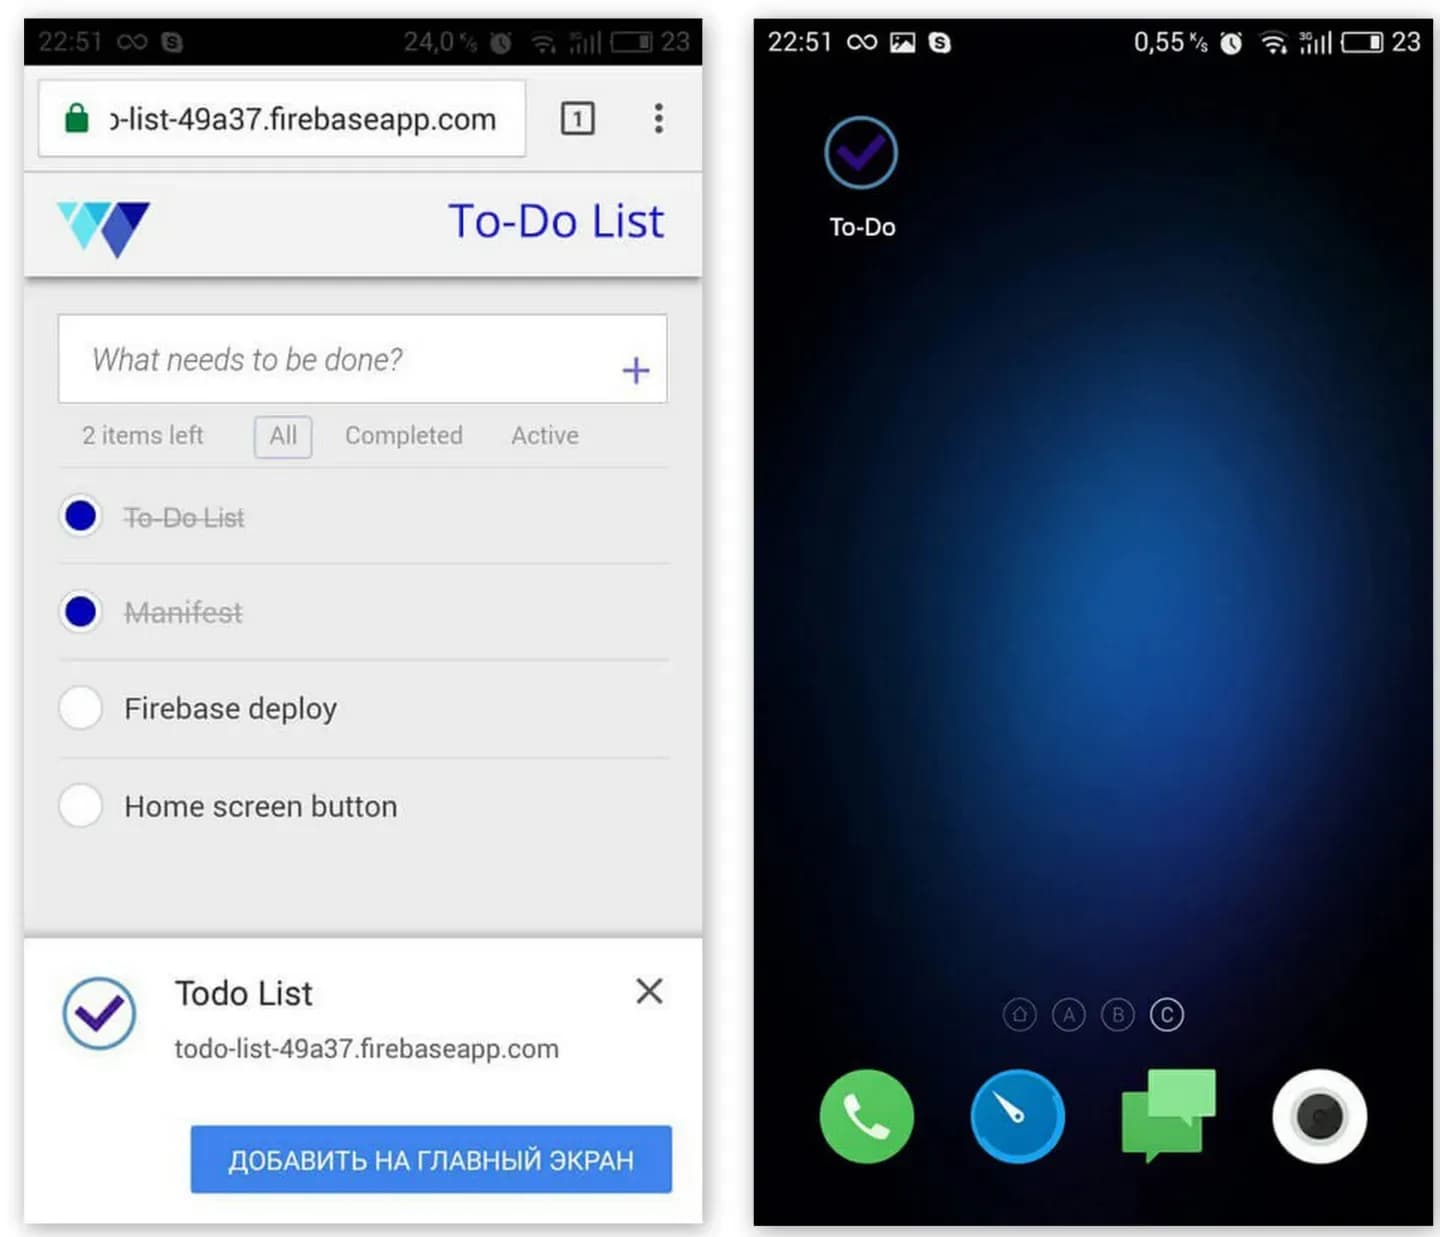
Progressive Web Apps not only provide installation ability, but also the ability to put them on a homescreen banner like a native web app.

Step 4: How to Add PWA to the Home Screen banner

Engineers from Google collected the required criteria:

  • to have a web app manifest file, which defines how your app will appear in the user's system and how it should be launched
  • the manifest must have a `short_name`, a name to be displayed in the banner
  • to have a loadable start URL (e.g. / or index.html)
  • PNG icon should be at least 144x144
  • icon declarations should include a mime type of image/png
  • to have a Service Worker registered on your site. We recommend a simple custom offline page service worker
  • Your site needs to be served over HTTPS (service worker requires HTTPS for security concerns)
  • Your site must have at least 2 user visits with at least five minutes between them

However, please keep in mind that this criteria will change over time.
Only Chrome for Android (starting from Chrome 42) allows users to quickly install your Web App.

The last thing left to make our app work: HTTPS (as required by Service Worker).

Step 5: How to Deploy a Progressive Web App to the Firebase

Firebase is the cloud service tool and infrastructure you need to build your App into the Web. It provides simple usage of storage, hosting, push notification services and many other opportunities. Besides this, it secures your App with HTTPS.

To deploy our Progressive Web App to Firebase we need to do the following:

  1. Sign in to FireBase
      • If you are new to Firebase – create an account
      • Install the Firebase console tools (npm install -g firebase-tools)
    1. Create an App using your account
    2. Deploy the app to Firebase
      • If this is the first time you're installing Firebase tools, update your credentials (firebase login)
      • Initialize your App in the root directory (firebase init)
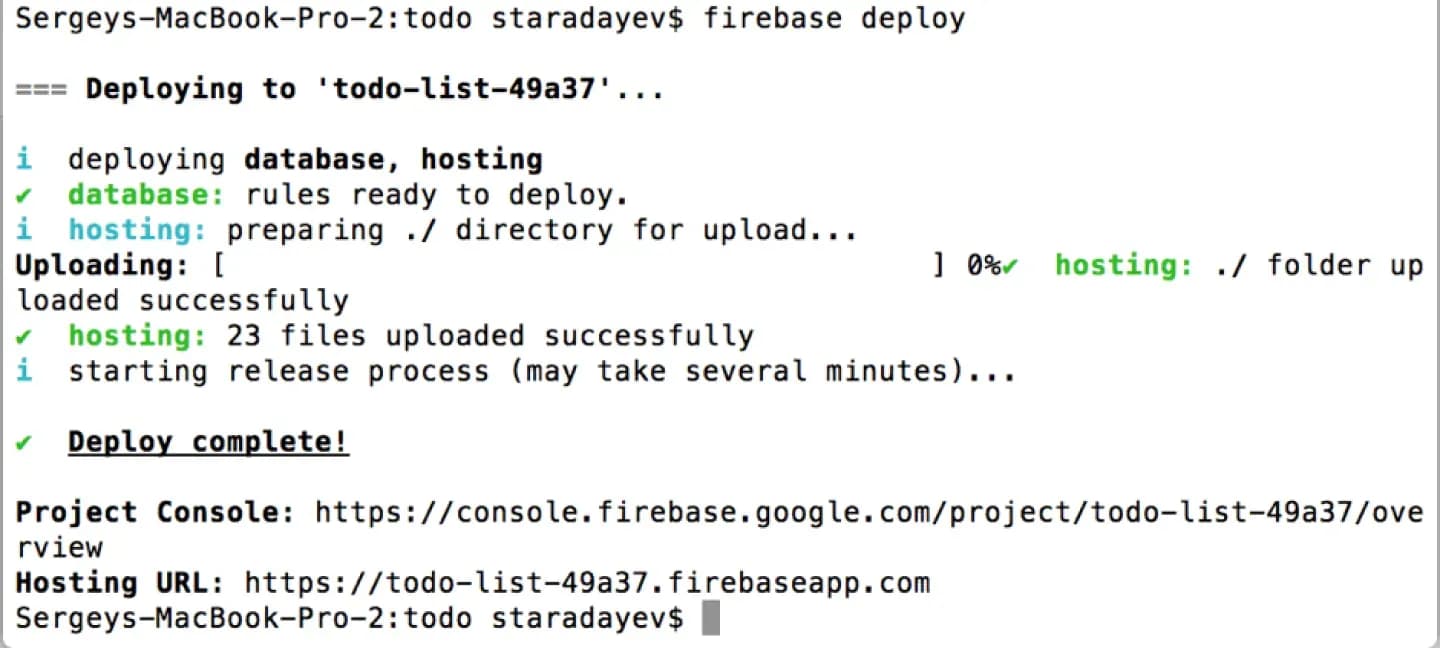
      • Deploy your app to the cloud service (firebase deploy)

That is it! It’s time to finally try our newly-created Progressive Web App. You can go to the app URL via a browser from the desktop or a mobile device to discover it. You can easily share it, use offline, and just enjoy its wonderful app-like behavior.

As an Epilogue

Browser support casts a shadow on this new trend. So far the complete experience is available for the Chrome browser only. Opera and Mozilla have certain limitations, having not implemented some features yet. Edge is in development now, and looks like it's coming soon. Safari – no support at all.

Nevertheless, in our opinion, Progressive Web Apps allow us to do big things. They bring ordinary websites to a new level and make them much more user-friendly. Keep in mind, it is not a separate solution, just an enhancement of an existing one, but for sure a cool, powerful and useful enhancement.

P.S. We decided to help Google and suggested how the logo for PWA technology could look like 🙂

About the author & stay in touch
WT
Waverley Team
Content Writer
Stay up to date

Subscribe to Waverley's newsletter and stay up to date with the latest articles.

Let's Work Together

Ready to build something great?

Let's talk about your project.

Contact Us