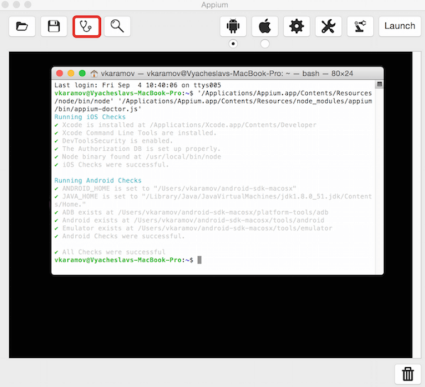
Open ‘View→ Tool Windows → Project’ to see the Project’s tree, delete the ‘main’ folder (it’s not obligatory) entirely and create a package waverley.util under src/test/java. Create an AppiumTest class. The key method here is setUp() where we provide so-called “desired capabilities”, required for the driver initialization. The capabilities should match the options we’ve set in the Appium desktop app.:
@Before public void setUp() throws Exception { DesiredCapabilities capabilities = new DesiredCapabilities(); capabilities.setCapability("appium-version", "1.4.8"); capabilities.setCapability("platformName", "Android"); capabilities.setCapability("deviceName", "Android"); capabilities.setCapability("platformVersion", "4.0"); mDriver = new AndroidDriver(new URL("http://127.0.0.1:4723/wd/hub"), capabilities); Helpers.init(mDriver); }In the next step let’s make the waverley.util.Helpers class where we implement all the boilerplate code needed for our tests.
In the init() we set the amount of time the Appium Driver would search for the element. You may want to make it higher than 30 seconds, depending on your hardware or test logic. The next thing we need to add is the ability to search for an element using the given strategy.
public static MobileElement element(By locator) { WebElement webElement = mDriver.findElement(locator); return w(webElement); } The search strategy is called the Locator and is implemented by org.openqa.selenium and io.appium.java_client.MobileBy classes. So, which strategies are available? By:
The last one is the easiest and at the same time the slowest strategy. Many novice automation engineers often overuse this technique and get unsatisfactory software testing performance. So we’d better write our first test using the XPath search strategy. We should create a new public class waverley.AppTest and the testing method for it:
public class AppTest extends AppiumTest { @Test public void testXPath() throws Exception { String text = Helpers.element(By.xpath("//android.view.View[1]" + "/android.widget.FrameLayout[2]/android.widget.ListView[1]" + "/android.widget.TextView[3]")).getText(); assertEquals("App", text); } } Instead of calling Helpers.element(locator).getText(), we could also create a wrapper: getText(locator), which internally does driver.findElement(el).getText(), which might be simpler.
Here we should annotate our class by @Test annotation to let Java test framework know that it should recognise testXPath() as a test and call it whenever tests are executed.
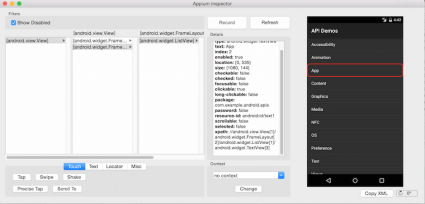
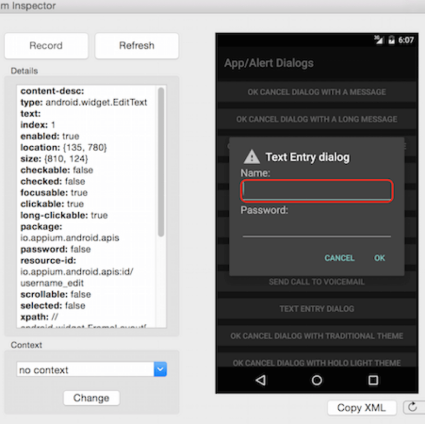
Please look at the Appium Inspector screenshot above. On the right we have the application’s main screen, called the Main Activity among Android developers. The “App” cell is selected. It can be reached by so called XPath. You can find out any element’s XPath by selecting it in the Inspector and looking at the “Details” list.
Now please recall what we do in Helpers.element() – we ask the driver to find the element in the current Activity using the given strategy. Here we create the XPath strategy
By.xpath("//android.view.View[1]/android.widget....")After this review the element and check the text it displays.
String text = Helpers.element(...).getText();
We expect this text to be “App” otherwise something might go wrong:
assertEquals("App", text);That’s it. Simple, isn’t it? 🙂